# A

# 概述
;a (opens new window) 元素可通过其href属性创建指向其他网页、文件、同一页面内的位置或其他URL的超链接。
其基本属性及含义如下。
href:链接目标的URLhreflang:指定目标URL的语言rel:指定当前文档和被链接文档的关系target:指定打开目标URL的方式media:指定目标URL的媒体类型type:指定目标URL的 MIME (opens new window) 类型download:指示浏览器下载URL
# 链接样式
在浏览器中a标签的默认样式带有下划线,其状态和颜色如下。
link:未访问状态,字体颜色为蓝色visited:已访问状态,字体颜色为紫色hover:鼠标悬停状态active:鼠标点击时状态,字体颜色为红色focus:聚焦时的状态,可通过Tab键聚焦元素,聚焦时会出现边框(不同浏览器样式不一致)
<a href="https://www.baidu.com/">百度</a>
可通过伪类自定义不同状态的样式,注意link和visited必须在最前面,且没有先后顺序,而focus、hover和active 必须在后面,并且一定是focus、hover、active的顺序。
首先静态时(元素未被聚焦、鼠标点击或悬浮),a标签只能为未访问和已访问状态中的一种,进而只会命中link和visited伪类中的一种,另一种不会生效,因此link和visited没有先后顺序。
而在动态时(比如鼠标悬浮),a标签此时的样式应该是呈现悬浮的样式,由于伪类的权重都是一样的,因此hover伪类的样式必然要位于link和visited后面,才能覆盖其样式。
可以通过Tab键聚焦a标签,聚焦后,若鼠标悬浮在标签上,此时则需要呈现悬浮的样式,因此hover位于focus后面。
而在a标签被悬浮时,若此时点击鼠标不松开,则此时需要呈现点击的样式,因此active位于hover后面。
所以伪类顺序只能为link、visited、focus、hover、active或者visited、link、focus、hover、active两种。
a:link {
  color: pink;
}

a:visited {
  color: orange;
}

a:focus {
  color: blue;
}

a:hover {
  color: red;
}

a:active {
  color: green;
}
# 指定链接打开方式
;target用于指定链接的打开方式,包括如下四种。
_self:当前页面打开链接_blank:新窗口打开链接_parent:在当前框架的父框架打开页面_top:在当前框架的顶层框架打开页面
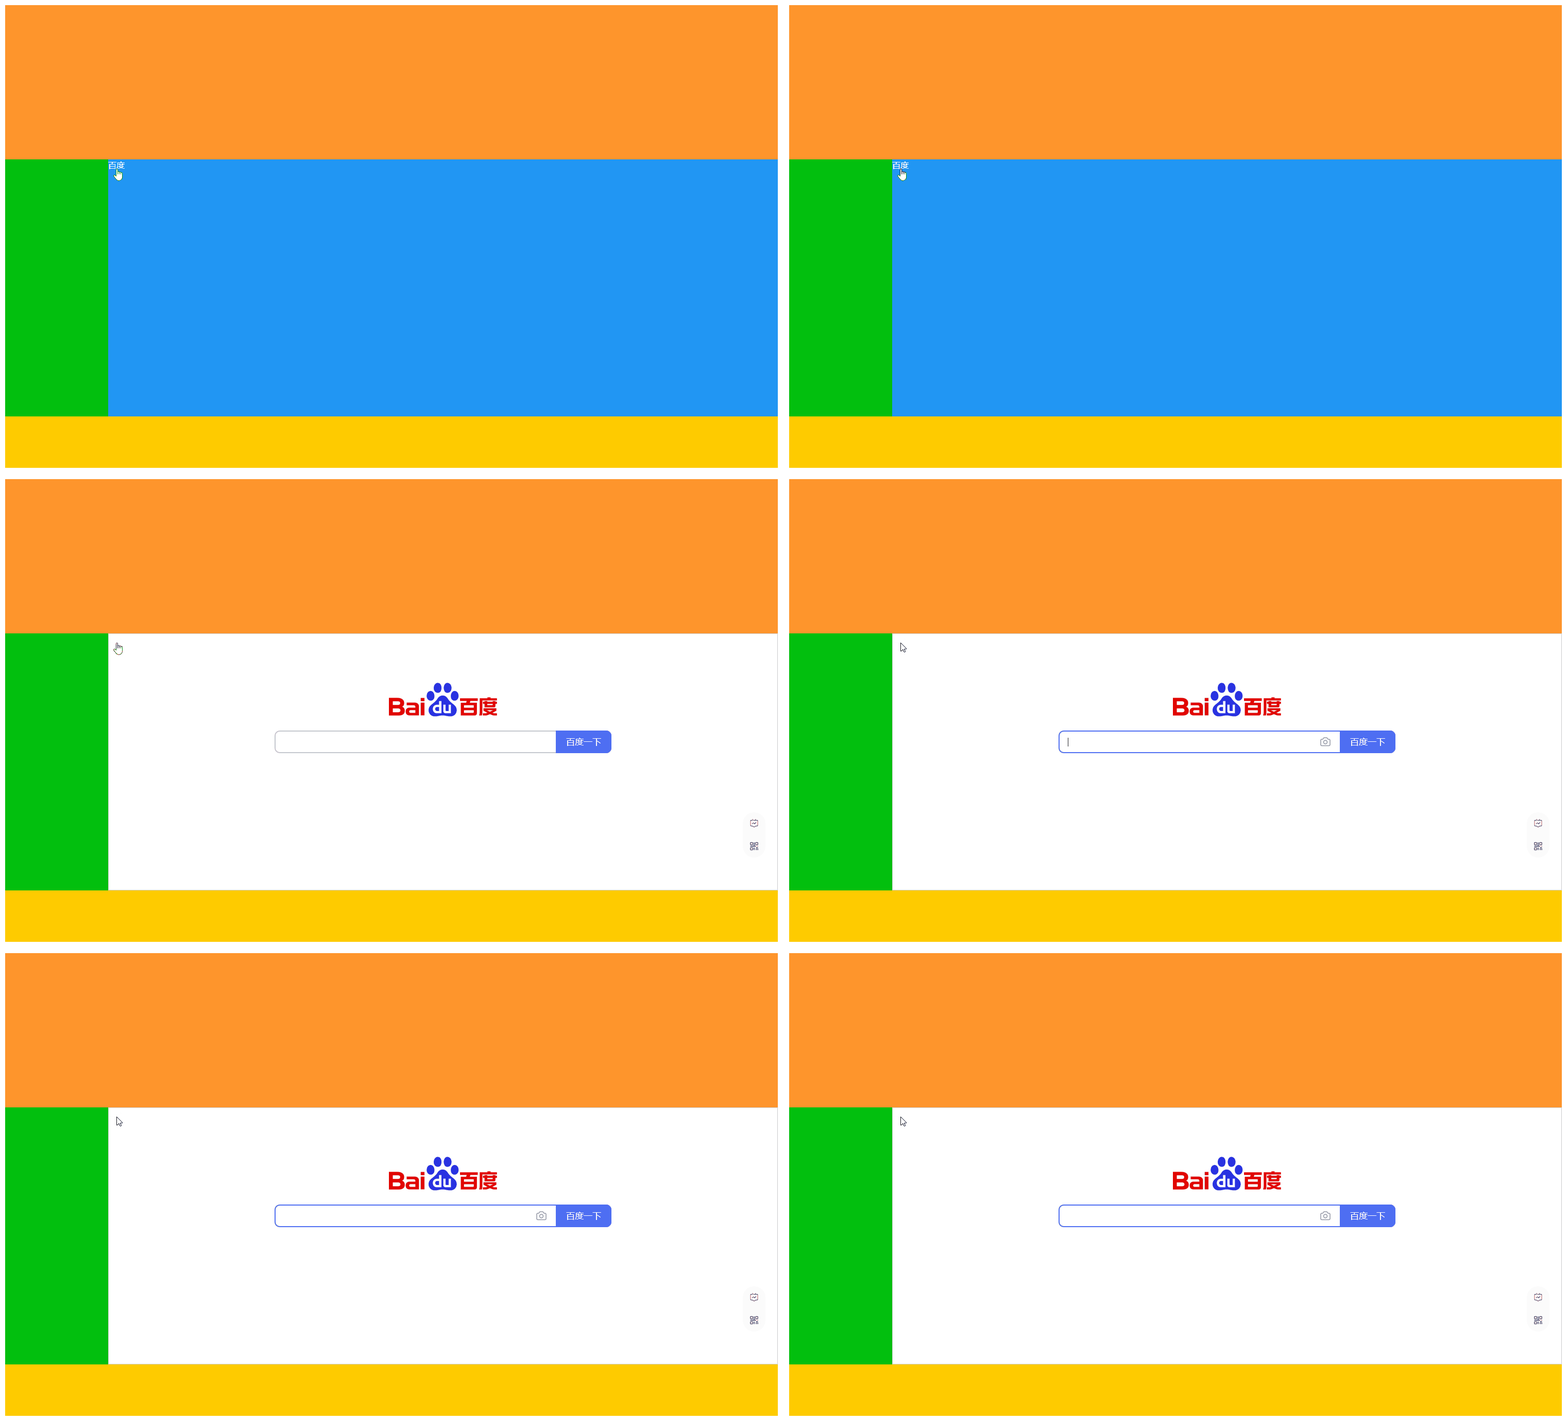
如下为main.html、top.html、center.html、left.html和right.html的页面结构,其中main.html通过iframe方式引入top.html和center.html,center.html也通过iframe方式引入left.html和right.html。

页面部分代码如下。
// main.html
<head>
  <style>
    body {
      width: 1500px;
      margin: 10px auto;
      display: flex;
      flex-direction: column;
    }

    iframe {
      width: 100%;
    }
  </style>
</head>

<body>
  <iframe src="top.html" frameborder="0" height="300px"></iframe>
  <iframe src="center.html" frameborder="0" height="600px"></iframe>
</body>

// top.html
<head>
  <style>
    body {
      width: 100%;
      height: 300px;
      margin: 0;
      background-color: #FF952C;
    }
  </style>
</head>

<body></body>

// center.html
<head>
  <style>
    body {
      height: 600px;
      background-color: #FFCC00;
      display: flex;
      margin: 0;
    }

    iframe {
      height: 500px;
    }
  </style>
</head>

<body>
  <iframe src="left.html" frameborder="0" style="width: 200px;"></iframe>
  <iframe src="right.html" frameborder="0" style="width: 1300px"></iframe>
</body>

// left.html
<head>
  <style>
    body {
      margin: 0;
      width: 100%;
      height: 500px;
      background-color: #02BF0F;
    }
  </style>
</head>

<body></body>

// right.html
<head>
  <style>
    body {
      margin: 0;
      width: 100%;
      height: 500px;
      background-color: #2196F3;
    }
  </style>
</head>

<body>
  <a href="http://www.baidu.com" target="_self" style="color: #fff;text-decoration: none;">百度</a>
</body>
# _self
修改right.html中a标签的target为_self,单击a标签。
可以看到在right.html框架中打开了百度,即在自身页面中单击target为_self属性的链接,将在本页面框架中打开目标页面。

# _parant
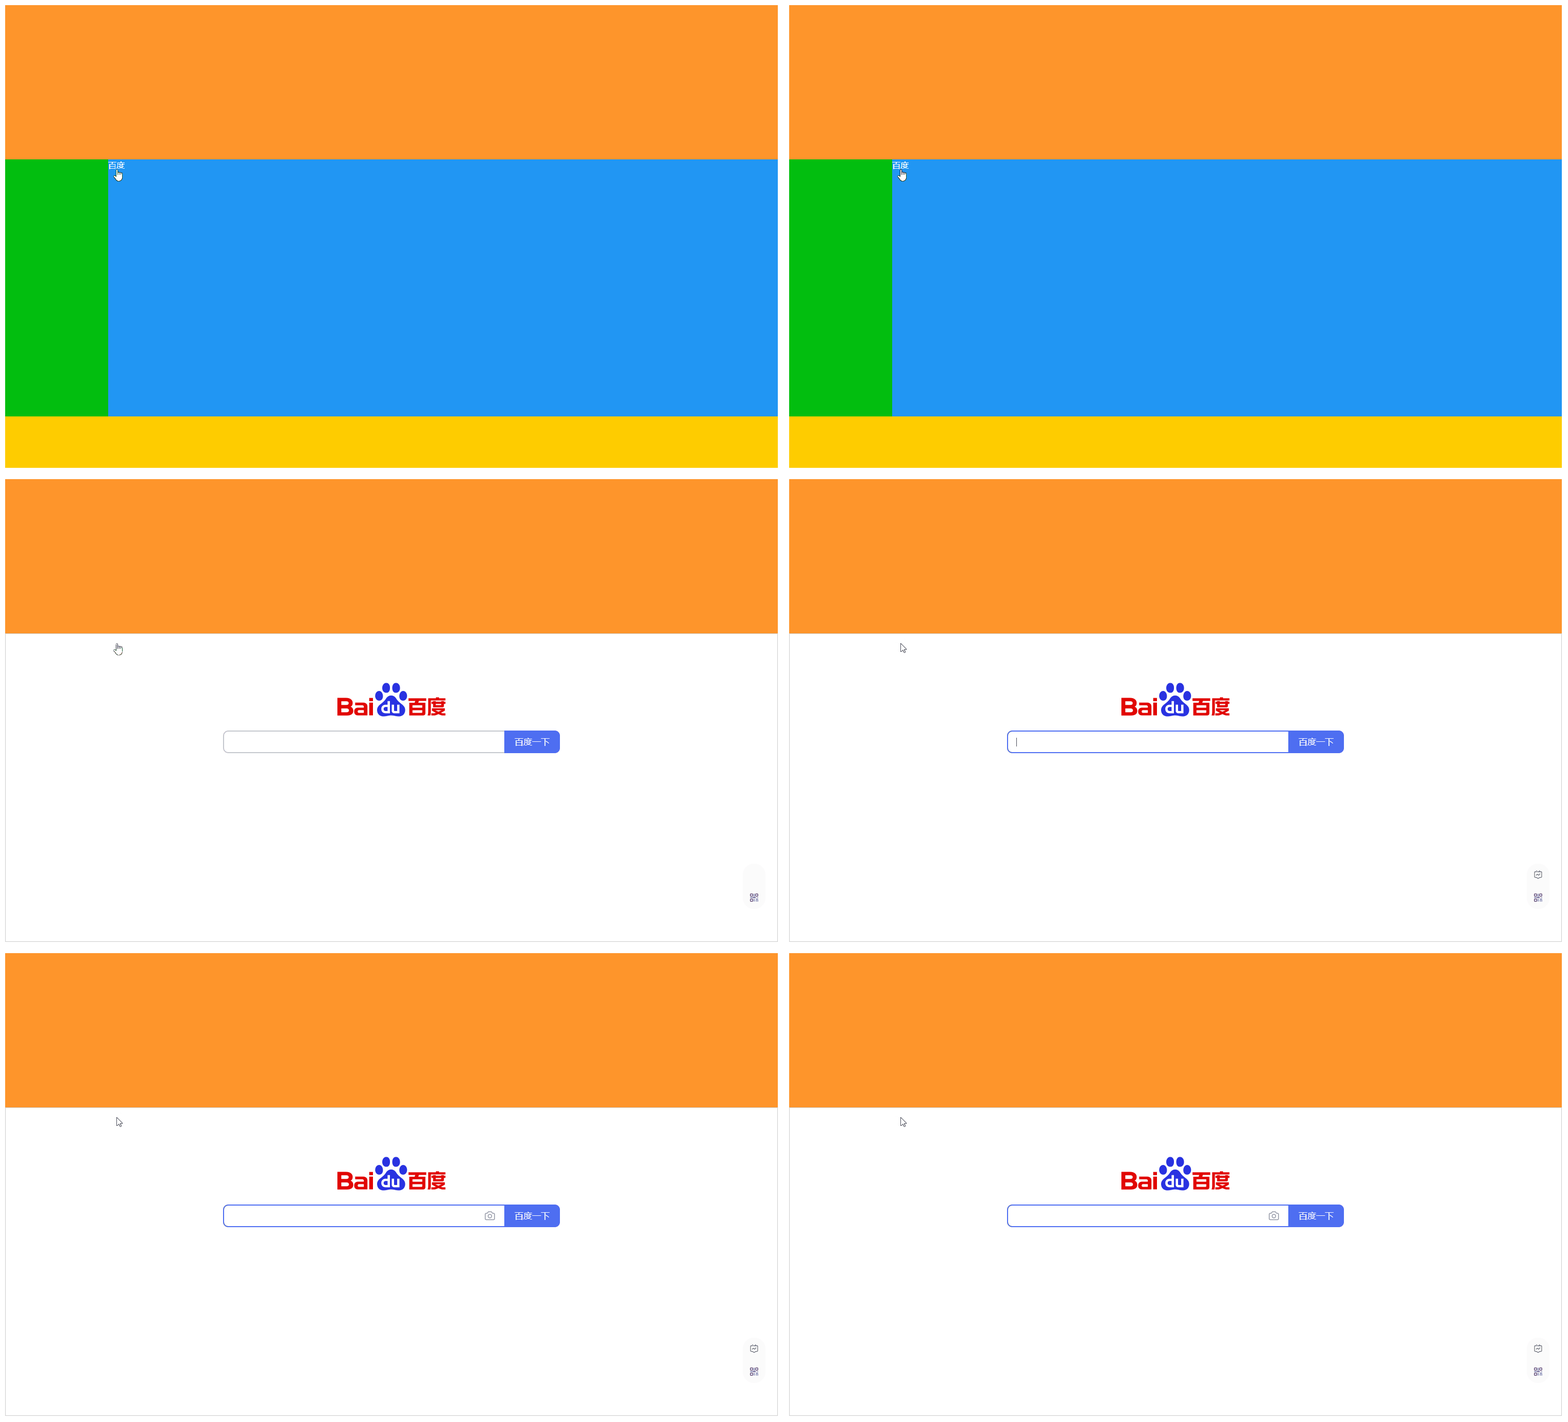
修改right.html中a标签的target为_parent,单击a标签。
可以看到在center.html框架中打开了百度,即在自身页面中单击target为_parent属性的链接,将在本页面的父框架中打开目标页面。

# _top
修改right.html中a标签的target为_top,单击a标签。
可以看到在main.html框架中打开了百度,即在自身页面中单击target为_top属性的链接,将在本页面的顶层框架中打开目标页面。

# _blank
;_blank则是打开一个新标签页显示目标页面。
# 锚点
页面内跳转,如下将跳转至本页面的h1锚点位置。
<a href="#h1">a</a>
<h1 id="h1">h1<h1>
跳转至其他页面的指定位置,如下将跳转至other.html页面中的p锚点位置。
<a href="other.html#p">a</a>
# 电话
拨打10086。
<a href="tel:10086">10086</a>
拨打客服电话400。
<a href="tel:400-888-8888">400-888-8888</a>
# 短信
发送短信至单个号码。
<a href="sms:10086">10086</a>
发送短信至多个号码。
<a href="sms:10086,10000">10086,10000</a>
发送短信DX到10086,注意安卓系统使用?连接发送内容,IOS系统使用&连接发送内容。
由于不同手机厂商或浏览器厂商对此标准支持度不同,最好还是不带body。
<a href="sms:10086?body=DX">DX</a>
# 邮箱
发送单个邮箱。
<a href="mailto:xxx@email.com">email</a>
发送多个邮箱。
<a href="mailto:xxx@email.com; xx@email.com">email</a>
;mailto相关参数如下。
mailto:收件人邮箱地址,若有多个收件人邮件地址,用分号;隔开cc:抄送人员邮箱地址,多人使用分号;隔开bcc:密送人员邮箱地址,多人使用分号;隔开subject:邮件主题body:邮件内容
<a href="mailto:xxx@email.com?cc=cc@email.com&bcc=bcc@email.com&subject=subject&body=body">email</a>
# 下载文件
下载图片,其中href为图片路径。
<a href="./image.png" download>image</a>
下载图片并指定下载名。
<a href="./image.png" download="name.png">image</a>
;download属性注意事项如下。
- 浏览器不能直接打开的文件(如
txt、zip等),不指定download属性也会直接下载 - 浏览器可以直接打开的文件(如
png、css、js、html等),需指定download属性才能下载 download属性值可以不指定后缀名,下载时浏览器会自动补充download属性值指定了错误的后缀名,文件下载后将无法打开预览
# 同源策略
由于浏览器的 同源策略 (opens new window) 限制,若下载的文件与页面不同源,浏览器不会执行下载而是直接打开,更多 详细参考 (opens new window)。
如下若页面地址为http://127.0.0.1:3000,点击a标签将不会下载而是在浏览器打开。
<a href="https://www.baidu.com/logo.png" download>baidu</a>
# data:URLs
如下使用data:URLs的方式下载图片,首先通过canvas绘制图片,然后再使用canvas.toDataURL获取图片base64编码,最后再通过a标签完成下载。
<a href="javascript:void(0);" onclick="downloadFile(event)" src='https://www.baidu.com/logo.png'>download</a>
<script>
  function downloadFile(e) {
    const url = e.target.getAttribute('src')
    const image = new Image()

    image.setAttribute('crossOrigin', 'anonymous')
    image.src = url

    image.onload = () => {
      const canvas = document.createElement('canvas')
      const ctx = canvas.getContext('2d')

      canvas.width = image.width
      canvas.height = image.height

      ctx.drawImage(image, 0, 0, image.width, image.height)

      const ext = image.src.substring(image.src.lastIndexOf('.') + 1).toLowerCase()
      const name = image.src.substring(image.src.lastIndexOf('/') + 1)
      const dataURL = canvas.toDataURL('image/' + ext)

      const a = document.createElement('a')
      a.href = dataURL
      a.download = name
      a.click()
    }
  }
</script>
注意不设置crossOrigin,浏览器将会抛出如下错误。

其原因也是浏览器的同源策略导致,canvas绘制跨域请求的图片,就会造成画布污染,此时也就不能再调用toBlob()、toDataURL()和getImageData()了。img、form等支持跨域的标签,请求获取资源时会自动带上cookie,如果不做数据读取限制,则cookie数据将被上传到图片网站后台进而导致数据泄露。
因此可以在图片请求发起时增加crossOrigin="anonymous",不携带任何用户信息来获取图片。
# blob:URLs
如下使用blob:URLs的方式下载图片,通过使用canvas.toBlob获取到blob对象,然后再通过URL.createObjectURL获取到blob对象的一个内存URL,并且一直存储在内存中,直到document触发了unload事件或者执行revokeObjectURL来释放。
<a href="javascript:void(0);" onclick="downloadFile(event)" src='https://www.baidu.com/logo.png'>download</a>
<script>
  function downloadFile(e) {
    const url = e.target.getAttribute('src')
    const image = new Image()

    image.setAttribute('crossOrigin', 'anonymous')
    image.src = url

    image.onload = () => {
      const canvas = document.createElement('canvas')
      const ctx = canvas.getContext('2d')
      const name = image.src.substring(image.src.lastIndexOf('/') + 1)

      canvas.width = image.width
      canvas.height = image.height

      ctx.drawImage(image, 0, 0, image.width, image.height)

      canvas.toBlob(blob => {
        const url = window.URL.createObjectURL(blob)
        const a = document.createElement('a')

        a.href = url
        a.download = name
        a.click()
        a.remove()

        window.URL.revokeObjectURL(url)
      })
    }
  }
</script>
# ajax
上述两种方式只对图片适用,对于pdf或者txt等则不行。
可以通过ajax方式请求到文件的blob数据,再通过blob:URLs的方式下载。
注意ajax请求方式会存在跨域问题,需要服务器支持。
<a href="javascript:void(0);" onclick="downloadFile(event)" src='http://www.baidu.com/txt.txt'>download</a>
<script>
  function downloadFile(e) {
    const url = e.target.getAttribute('src')
    const name = url.substring(url.lastIndexOf('/') + 1)

    axios.get(url, { responseType: 'blob' }).then(res => {
      const blob = res.data
      const url = URL.createObjectURL(blob)
      const a = document.createElement('a')

      a.href = url
      a.download = name
      a.click()
      a.remove()

      window.URL.revokeObjectURL(url)
    })
  }
</script>
# 🎉 写在最后
🍻伙伴们,如果你已经看到了这里,觉得这篇文章有帮助到你的话不妨点赞👍或 Star (opens new window) ✨支持一下哦!
手动码字,如有错误,欢迎在评论区指正💬~
你的支持就是我更新的最大动力💪~
GitHub (opens new window) / Gitee (opens new window)、GitHub Pages (opens new window)、掘金 (opens new window)、CSDN (opens new window) 同步更新,欢迎关注😉~
