# 进行浏览器原生的图片懒加载的几种方式和原理

# 前言
对于图片较多的网站,倘若一次性加载所有图片,一方面由于同时加载的图片较多,页面的DOM元素将非常多,会造成页面卡顿性能严重下降,另外服务器的压力也会很大。另一方面若加载了很多图片,而用户浏览的图片仅有几张,将会耗费大量流量,造成浪费。
而懒加载就是针对此情况做的优化,同时会极大地提升用户体验。一句话总结就是,懒加载即延时加载,当图片要用到的时候再去加载。
# offsetTop
懒加载的图片一般是固定宽高的,为避免图片较大时拉伸,可运用object-fit: cover来裁剪。
<style>
  img {
    display: block;
    margin-bottom: 10px;
    width: 100%;
    height: 200px;
    object-fit: cover;
  }

  body {
    margin: 0;
  }
</style>

<img data-src="1.jpg" alt="">
<img data-src="2.jpg" alt="">
<img data-src="3.jpg" alt="">
<img data-src="4.jpg" alt="">
<img data-src="5.jpg" alt="">
<img data-src="6.jpg" alt="">
<img data-src="7.jpg" alt="">
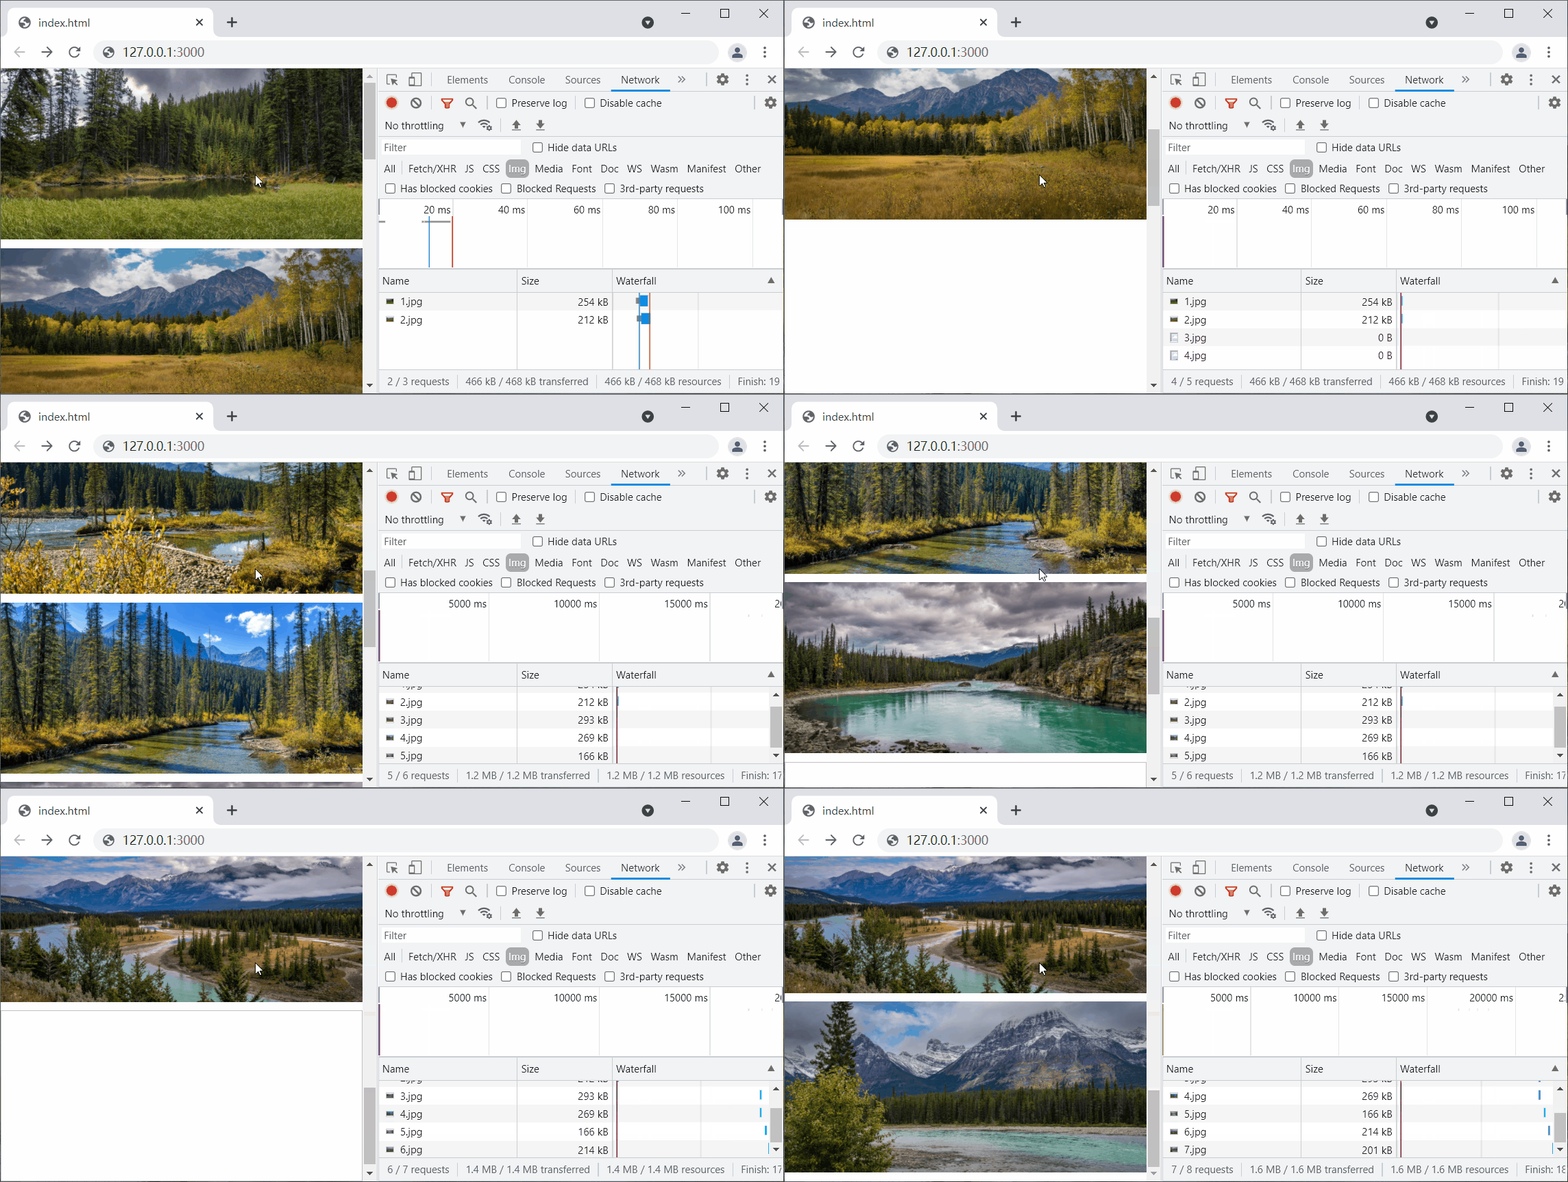
其中loadImg用来加载图片src属性。
而滚动条频繁滚动会对浏览器性能有影响,因此封装debounce防抖函数来限制触发频率。注意debounce内部返回函数不能为箭头函数,会导致函数内this指向改变,只有为普通函数,this才能指向绑定事件的对象,例如el.addEventListener(event, fn),fn内部this应指向el。
理论上图片位于视口就可以加载,但是为了提升用户体验,可以在图片距离视口固定距离就开始提前加载,因此全局定义了offset偏移变量。
# 滚动条高度
;lazyLoad函数中,window.innerHeight为视口高度,document.documentElement.scrollTop和document.body.scrollTop都是获取滚动条滚动距离,两者差异主要取决于文档是否声明doctype。
| 方式 | 类型 | Chrome | Firefox | IE11 | IE10 | IE9 |
|---|---|---|---|---|---|---|
HTML文档声明doctype | document.documentElement.clientHeight | 可获取 | 可获取 | 可获取 | 可获取 | 可获取 |
document.body.scrollTop | 0 | 0 | 0 | 0 | 0 | |
HTML文档未声明doctype | document.documentElement.clientHeight | 0 | 0 | 可获取 | 可获取 | 可获取 |
document.body.scrollTop | 可获取 | 可获取 | 可获取 | 可获取 | 0 |
可以明显观察到document.documentElement.scrollTop和document.body.scrollTop中总有一个可以获取到滚动距离,因此可以document.documentElement.scrollTop || document.body.scrollTop来兼容。
<script>
  const loadImg = el => {
    if (!el.src) {
      el.src = el.dataset.src
    }
  }

  const debounce = (fn, delay = 100) => {
    var timer = null

    return function (...args) {
      if (timer) {
        clearTimeout(timer)
        timer = null
      }

      timer = setTimeout(() => {
        fn.call(this, ...args)
      }, delay)
    }
  }

  const imgs = document.querySelectorAll('img')

  const offset = 20

  var loaded = 0

  const lazyLoad = () => {
    const clientHeight = window.innerHeight
    const scrollTop = document.documentElement.scrollTop || document.body.scrollTop

    for (var i = loaded; i < imgs.length; i++) {
      if (imgs[i].offsetTop <= clientHeight + scrollTop + offset) {
        loadImg(imgs[i])
        loaded++
      } else {
        break
      }
    }
  }

  lazyLoad()

  window.addEventListener('scroll', debounce(lazyLoad, 200))
</script>
# loaded 变量
另外全局还定义了loaded变量,用来存储图片即将加载的索引,以此避免每次从第一张图片开始遍历。
;for循环体内if语句为关键部分,只要图片的offset属性小于视口高度、滚动距离与偏移值之和,则必然加载图片。某张图片不满足加载条件,则后续图片必然也不满足,因此break提前终止循环。

# getBoundingClientRect
;getBoundingClientRect (opens new window) 用于返回元素的大小及相对于视口的位置。
浏览器兼容性方面,Chrome、Firefox和IE5及以上浏览器等均兼容。
标准盒模型,元素的宽高尺寸为width/height + padding + border-width总和。若其CSS属性为box-sizing: border-box,则元素尺寸为width/height。
#img {
  display: block;
  margin-bottom: 10px;
  width: 300px;
  height: 200px;
  border: 10px solid lightblue;
  padding: 20px;
}

<img id="img" src="image.png" alt="">

const img = document.getElementById('img')
console.log(img.getBoundingClientRect())
# 浏览器差异
;Chrome浏览器打印参数。

;IE8浏览器打印参数,注意IE8及以下浏览器返回的对象中不含width、height属性。

;IE7浏览器打印参数,注意IE7浏览器中的页面内的HTML元素的坐标会从(2, 2)开始计算。

因此封装为工具函数,兼容IE7及以上浏览器。
function getBoundingClientRect(el) {
  var rect = el.getBoundingClientRect()
  var l = document.documentElement.clientLeft
  var t = document.documentElement.clientTop

  return {
    left: rect.left - l,
    right: rect.right - l,
    bottom: rect.bottom - t,
    top: rect.top - t,
    width: rect.right - rect.left,
    height: rect.bottom - rect.top,
  }
}
根据此工具函数,针对offsetTop方式的懒加载稍作修改。
const lazyLoad = () => {
  for (var i = loaded; i < imgs.length; i++) {
    if (getBoundingClientRect(imgs[i]).top <= window.innerHeight + offset) {
      loadImg(imgs[i])
      loaded++
    } else {
      break
    }
  }
}
# IntersectionObserver
;IntersectionObserver (opens new window) 是浏览器提供的构造函数,用于创建一个观察器实例,详细参考 (opens new window)。
const io = new IntersectionObserver(callback, options)
此实例提供了部分方法。
io.observe():开始观察,参数为某个DOM节点对象io.unobserve():取消观察,参数可为DOM节点对象,也可不传io.disconnect():关闭观察器
再来看看callback回调函数,一般是视窗观察某个或多个元素,且callback通常会触发两次,一次是被观察元素刚进入视口时,另一次是被观察元素完全离开视口时。
const io = new IntersectionObserver((entries, observer) => { })
# IntersectionObserverEntry
;observer为被调用的IntersectionObserver实例,即上述io实例。
;entries是一个 IntersectionObserverEntry (opens new window) 对象数组。若视窗观察了3个元素,则entries数组内就会有3个实例,且均是IntersectionObserverEntry对象。
;Chrome浏览器下IntersectionObserverEntry对象包括8个属性。

boundingClientRect:被观察元素的矩形信息,即被观察元素执行el.getBoundingClientRect()的返回结果intersectionRect:被观察元素与视窗(或者根元素)的相交区域的矩形信息intersectionRatio:相交比例,即intersectionRect占boundingClientRect面积的比例,被观察元素完全可见时为1,完全不可见时为0isIntersecting:被观察元素是否在视窗中可见,可见则为truerootBounds:根元素矩形信息,未指定根元素则为视窗的矩形信息target:被观察元素,是一个DOM节点time:高精度时间戳,单位为毫秒。表示从IntersectionObserver的时间原点到callback被触发时两者之间的时间长度
构造函数IntersectionObserver的第二个参数options是一个对象,主要包括三个属性。
threshold:即被观察元素在视口中可见部分为多少时,触发回调函数,threshold为一个数组,默认为[0]
如下被观察元素有0%、50%、75%、100%可见部分时,触发回调函数
new IntersectionObserver(callback, {
  threshold: [0, 0.5, 0.75, 1],
})
root:除了支持观察视窗内元素,也支持指定根元素
如下ul元素内部多个li滚动时,某个li出现在ul时触发。
<style>
  ul {
    width: 300px;
    height: 100px;
    overflow: auto;
  }

  li {
    height: 24px;
    background-color: #ccc;
    margin-bottom: 1px;
  }

  li:nth-of-type(9) {
    background-color: lightblue;
  }
</style>

<ul>
  <li>1</li>
  <li>2</li>
  <li>3</li>
  <li>4</li>
  <li>5</li>
  <li>6</li>
  <li>7</li>
  <li>8</li>
  <li>9</li>
  <li>10</li>
</ul>
<script>
  const ul = document.querySelector('ul')
  const li = document.querySelectorAll('li')[8]
  const callback = entries => {
    console.log(entries)
  }
  const io = new IntersectionObserver(callback, {
    root: ul,
  })

  io.observe(li)
</script>
注意根元素必须为被观察元素的祖先元素。

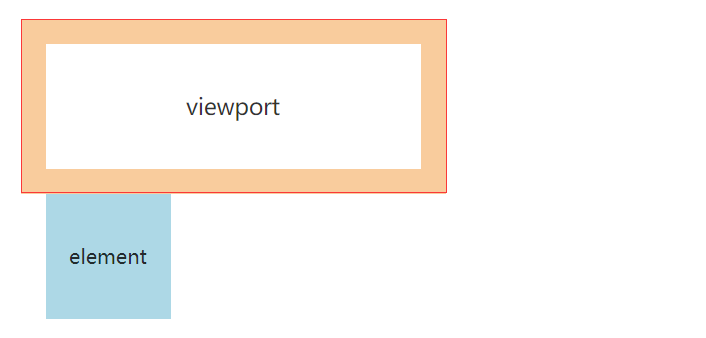
rootMargin:定义视窗或者根元素的margin,用于拓展rootBounds区域的大小,默认值为"0px 0px 0px 0px"
如下视窗被拓展为红色区域部分,一般被观察元素仅在视窗中出现(或者出现指定比例)才会触发,若要被观察元素在距离视窗固定距离就提前触发,rootMargin则可派上用场了。

# 实现部分
现在来看图片懒加载的情况,代码比较少,先看代码。
<script>
  const loadImg = el => {
    if (!el.src) {
      el.src = el.dataset.src
    }
  }

  const offset = 20

  const imgs = document.querySelectorAll('img')

  const callback = (entries, i) => {
    entries.forEach(el => {
      if (el.isIntersecting) {
        loadImg(el.target)
        io.unobserve(el.target)
      }
    })
  }

  const io = new IntersectionObserver(callback, {
    rootMargin: `0px 0px ${offset}px 0px`,
  })

  imgs.forEach(img => io.observe(img))
</script>
首先创建观察器io,由于未指定根元素,所以默认为视窗,然后视窗遍历观察img元素。
还是和offsetTop方式一致,距离视口20px就提前加载图片。因此添加rootMargin配置项。
;callback回调函数部分,元素只要出现在视口,则加载图片,同时unobserve取消观察对应的img元素。
# 兼容性
以上对于Chrome或者Firefox等浏览器是完全可用的,对于IE9-11是不兼容的,利用 intersection-observer-polyfill (opens new window) 插件来兼容一波吧。
注意IE浏览器不支持object-fit样式,但是不是重点,不过多详述,感兴趣可以自己捣鼓。
<script src="IntersectionObserver.js"></script>
<style>
  img {
    display: block;
    margin-bottom: 10px;
    width: 100%;
    height: 200px;
    /* object-fit: cover; */
  }

  body {
    margin: 0;
  }
</style>

<script>
  var loadImg = function (el) {
    if (!el.src) {
      el.src = el.getAttribute('data-src')
    }
  }

  var offset = 20

  var imgs = document.getElementsByClassName('aaa')

  var callback = function (entries, i) {
    entries.forEach(function (el) {
      if (el.isIntersecting || el.intersectionRatio > 0) {
        loadImg(el.target)
        io.unobserve(el.target)
      }
    })
  }

  var io = new IntersectionObserver(callback, {
    rootMargin: '0px 0px ' + offset + 'px 0px',
  })

  for (var i = 0; i < imgs.length; i++) {
    io.observe(imgs[i])
  }
</script>
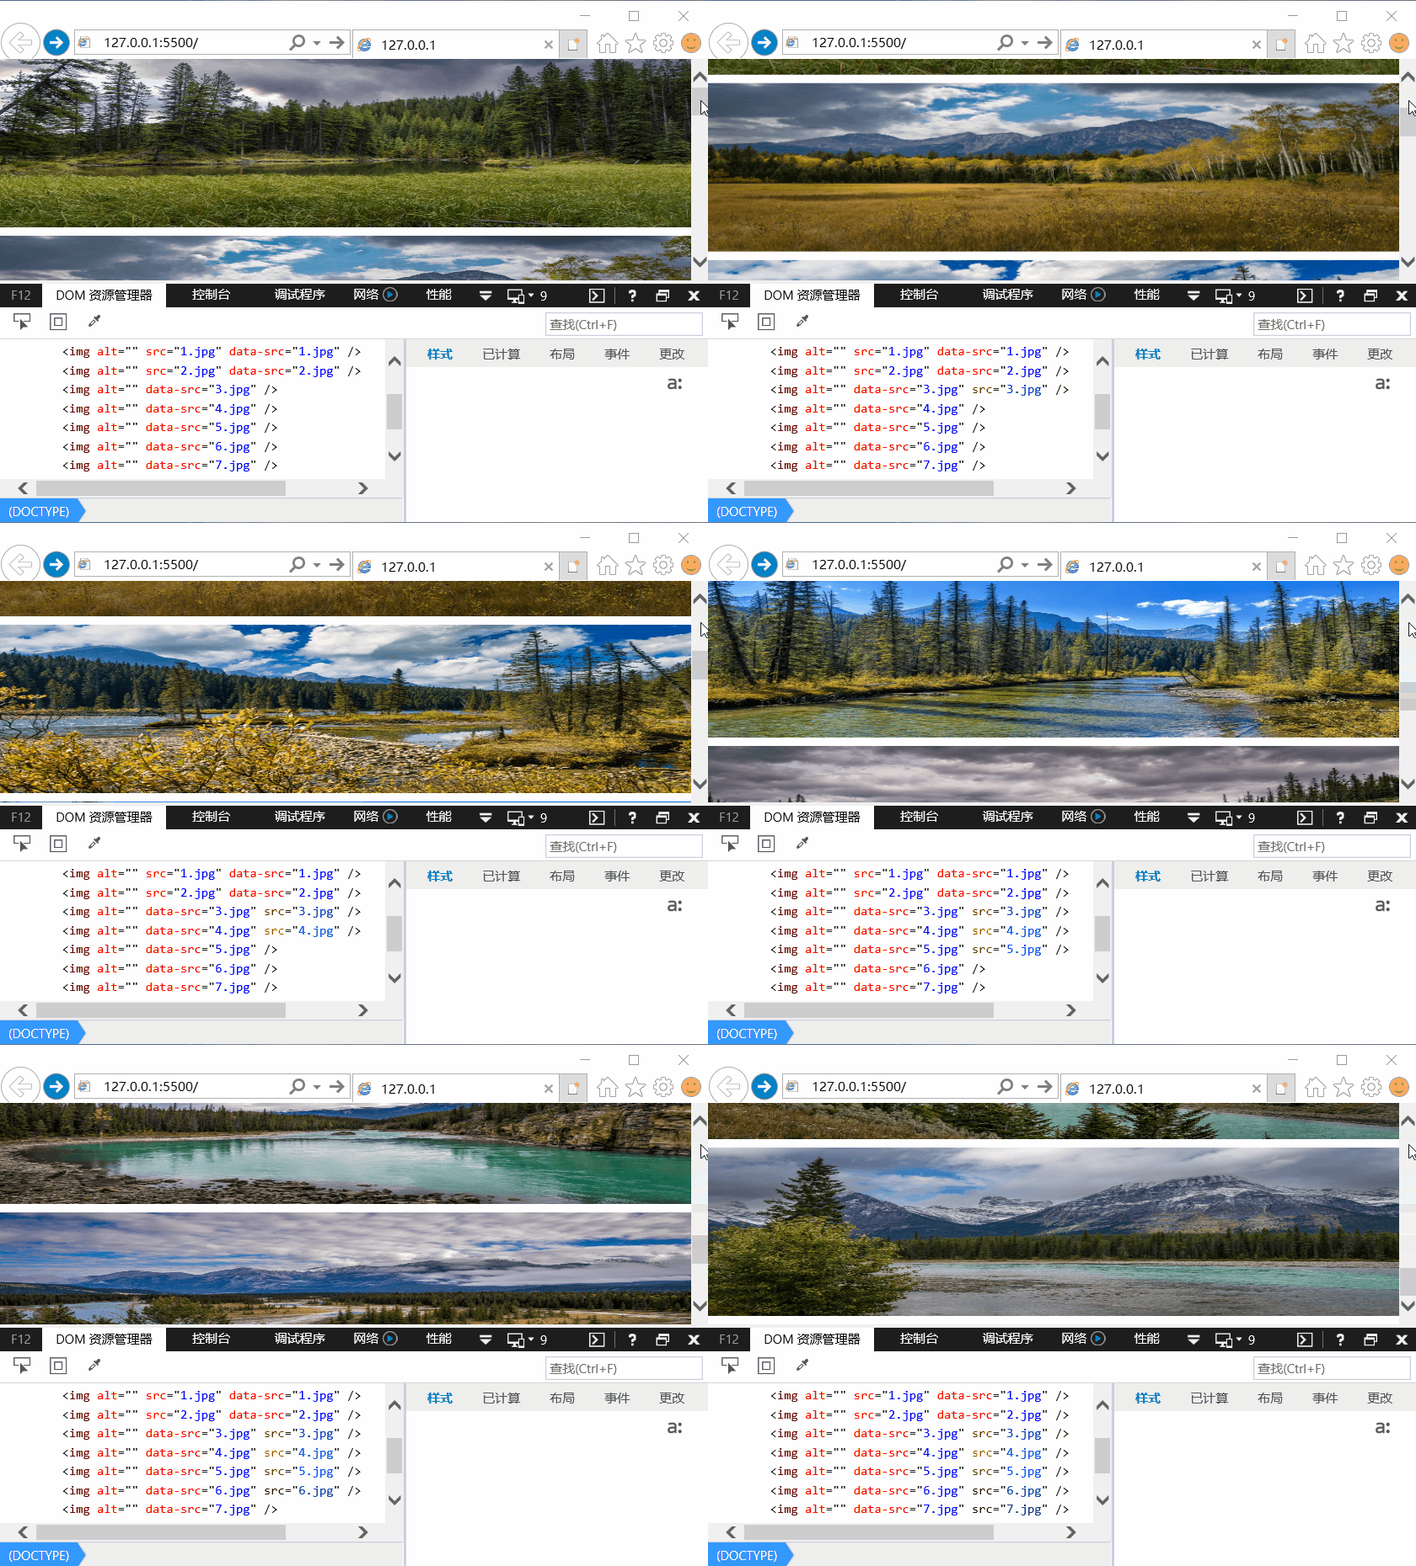
;IE9浏览器下效果。

# 🎉 写在最后
🍻伙伴们,如果你已经看到了这里,觉得这篇文章有帮助到你的话不妨点赞👍或 Star (opens new window) ✨支持一下哦!
手动码字,如有错误,欢迎在评论区指正💬~
你的支持就是我更新的最大动力💪~
GitHub (opens new window) / Gitee (opens new window)、GitHub Pages (opens new window)、掘金 (opens new window)、CSDN (opens new window) 同步更新,欢迎关注😉~
